“The Polish”
This is the topic that seems to gather the most interest. On these next seven pages we have attempted to cover in detail the trials and tribulations of what it takes to polish an Airstream.
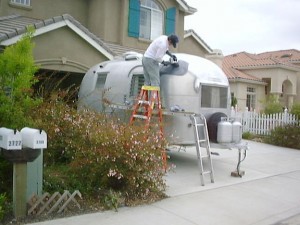
“The Polish” was the final step in the 9 month restoration of the Caravel. We saved it for last because the ongoing work on the exterior might damage the final finish if accomplished too early in the project. This is the step that cost dearly in terms of time, money and sweat expended, but is the one event that changed us from “the crazy neighbors with the ugly little toaster” to the “neighbors with the cool looking classic trailer”. The methods outlined below are but some of the possible processes available to polish an Airstream. I experimented as I went, trying different products and procedures, and have noted the failures and successes.
UPDATE February 2003. We have had the trailer polished for over 3 seasons. I’ve updated the entire Polish section to reflect our experiences with maintaining the finish, plus the results of further experimentation and introduction to new techniques learned on the 1956 Flying Cloud.
First some basics.
Tools & Supplies
Polisher
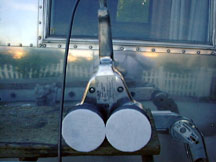
Back in 1999 I mainly used a Cyclo 5 dual head polisher with different grades of foam heads (bonnets) and Rolite aircraft polishes. The “legendary” polishing tool, “the Cyclo 5 dual head random orbital polisher” – was designed primarily for polishing autos and aircraft finishes. We got ours from Top-of-the-Line via the Internet. Their prices were the lowest I found, and surprisingly good service. The Cyclo housing is well built and durable – I dropped mine more than once without damage. The aluminum housing makes it a little heavy at 7#, but the dual heads and balanced design results in one hand operation on the top skin surface. It is a good idea to oil the top bearing once a day with a light oil. I understand that the cheaper plastic body model knock-off has been discontinued due to poor reliability.
I used about 16 of the foam pads back then in different grades. I no longer would recommend them. The pads required frequent cleaning and would fill with aluminum mud quickly, creating swirl marks. Since that time, the use of sweatshirt material on the Cyclo has become the preferred and easiest method. This is also less expensive, as it only requires the 3 each (1 as spare) of the Velcro boots, wool bonnets and terry cloth covers in addition to the sweatshirt material. More on this later.
Another polisher is required if you are polishing an oxidized trailer. The amount of mud created during this initial removal is tremendous, and
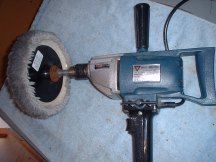
overloads foam pads and sweatshirt alike. The ideal tool is a 7 inch polish pad mounted on a low speed drill motor. This is sometimes refered to as a ‘Compounder’. I’ve used this set up now on the Flying Cloud, and the initial rate and ease of removal is far beyond the Cyclo. I got a Porter Cable head and pad from Great Lakes, and then cut down a 5/8″ bolt to fit it – I understand that you can now get this pre-done by Perfect-Polish. So, now I recommend using a low speed heavy-duty Drill motor and polish head initially, followed up with the Cyclo.
Scaffolding
Don’t even attempt polishing without scaffolding of some sort. Not only is it dangerous, it is impossible to get above the window line without it. It can be commercial scaffolding, two A-frame ladders and a 2×12 plank, or a hybrid like I used – 2×12 plank on a multi-position ladder with an A-frame ladder for access (see Page 1 for image). With this set-up I was able to reach the middle of the trailer by fully extending myself (I’m 6ft). Real scaffolding would have got me even a little higher, which would have been ideal. Scaffolding is available at Equipment Rental Yards or for purchase from places such as Harbor Freight.
Rags
You will use lots of them. They need to be 100% cotton without any polyester stitching. Diapers work the best. I started off with a dozen, and Krista bought some diaper cloth yardage and made up about 2 dozen more. That is the best way to do it. You will create copious piles of black rags – real black, blacker than any black you’ve ever known. At first I was pre-washing the rags in the laundry sink, then washing them in the washer and dryer. Towards the end I stopped the pre-wash because it was making a big mess of the sink, the laundry room and me. I ran each batch through the washer 3 times, one on soak w/bleach, 2 on hot w/detergent and wiped down the inside of the washer each time. You can imagine what would happen if a bit of this stuff got on your regular clothing. We have a stainless steel washer tub, so check yours first. Using the updated Compounder and sweatshirt method, you will use much fewer rags, but they are still needed for general clean-up and wipe downs, and they still get as black.
Protective Clothing
This is the messiest stuff on earth! I used the same pants, long-sleeve shirt and shoes from start to end, washing them each day. The best I could get the white shirt I was using was dark gray. You get black from head to toe from the aluminum oxide mud -it will permeate your pores. You will need gauntlet length chemical gloves during the Compounding stage. Thin surgical style latex gloves will suffice for the later stages. Don’t wear your “polishing shoes” in the house (they turn white carpets gray, even days later), and try to wash down your equipment each day. Our driveway became black around the trailer from stepping on the tiny little bits of mud flung off during the polishing, requiring a thorough scrubbing when we got done with detergent and a brush. If you are detecting a common theme here – you are right, this process is messy!
Other Materials
A spray bottle filled with Mineral Spirits (Paint Thinner) for clean-up and a solvent wipe down. Glass-Wax applied with a misting spray bottle has also become an invaluable tool for haze removal. For applying the polish, I use a wooden paint stir stick. I have found no better sealant than Parbond for sealing the joints and Vulkem for installing exterior parts and sealing gaps. Neither will corrode the aluminum, remains flexible to withstand the heating & cooling of the skin, and withstands polishing. The one thing that complicated the polishing process was a lack of cover over the trailer. If I were to do it again, it would in a barn, under a carport, or at least one of those temporary tent covers. The polishes work best when warm, but direct sun will heat the surface to the point it will burn you, cook the polish to the surface, and the glare will fry your skin and make it hard to see. As a result, I was limited to cloudy days, early mornings and late evenings. Many a night I was going until 9PM and the last light, as it was the ideal time – warm skin but no sun.
Polishes
If you were to examine the surface of the aluminum skin under a microscope, it would look like a mountain range with peaks and valleys. To attain a polished surface, you must clip the tops of the mountains and fill in the valleys. Polishing Compounds are the coarse sandpaper of the polishing process. They usually contain clay particulates or silicates in a lubricating oil that clip off the mountaintops. They can be labeled as fine, medium or heavy cut. The true “polishes” are usually a mixture of lubricating and emollient oils, chemical cleaners and plasticene fillers to fill in the valleys. These chemical cleaners are brighteners that remove a thin layer of material, usually from the ” mountaintops”, as they are suspended in a heavy oil. On the Caravel I used Rolite products, obtained from AirstreamDreams. It has the reputation of high quality in the aircraft restoration community. The Pre-Polish is a medium-cut compound used for oxide removal, the Polish is in reality a fine cut compound for general polishing, the AP-300 is a no cut polish, and the Polish/Sealer is a liquid “wax-on, buff-off” type of sealer with fillers and emollient oils – and maybe even a wax. They are expensive. I spent $180 on polish for our 17 footer. I think if the trailer still had the Clear-coat still on it to protect the surface from oxidation, we may have used less. I used 2 cans of 2lb Pre-polish, 1 can of 1lb Polish, 1/8 jar of AP-300 and 8 oz’s of the Sealer. As I noted in the first version of this summary, I would have liked to try the Nuvite polishes. Well, I have now, and can say the heavy cut G-3 polish is a great product – far superior to the Rolite Pre-Polish in getting off oxidation, and the other grades of Nuvite are better than the Rolite polishes in my experience. The Nuvite A is fine-cut polish that follows the F-7 and G-3 polishes, and the “S” is like almost like the AP-300, but with a little cut left in it – a fine finish polish. The Perfect-Polish website has a detailed breakdown of the various NuVite polishes. Most interesting, is that whatever base material the NuVite polishes are made from allow easier clean-up and removal from the trailer skin. I got the NuVite polish this time around from Perfect-Polish, and have used it almost exclusively – every now and then trying the Rolite, reminding me why I switched.
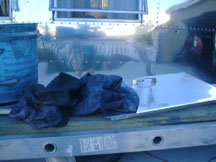
Once white cotton cloths

Rolite Polishes
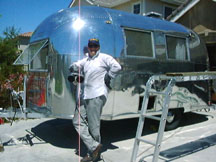
Tools of the trade – including sunglasses
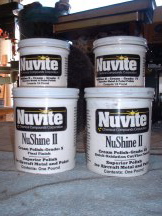
NuVite Polishes
The Process
Preparation
Now is the time to make sure all the skin repairs and exterior work is done. You don’t want to be working around your polished surface making scratches or getting sealant and your grubby handprints all over it. For stripping clear-coat, paint strippers work the best. Make sure all
removable parts (lights, vents, etc.) are removed, and those that can’t (reflectors, windows) are tightly taped and masked. Stripper will
instantly melt plastics and rubber. I found that to remove big scratches and blend out scrapes, a fine ScotchBrite pad and mandrel in a high speed pneumatic die-tool works the best – and quickly. The whole secret is to get a fine as finish before the polish. Wet (mineral spirits or paraffin oil) emery sandpaper (600-1000 grit) works well to touch-up the rough finish the ScotchBrite leaves. 00000 steel wool can be used, and coarser grades on the alloyed extrusions that make up the windows. Remove any dried-out sealant from the seams. I found that pop-sicle sticks (craft sticks) work the best. They can be broken to create sharp points or cut to fit down inside seams. Don’t use a metal putty knife to remove sealant. There are plastic ones that will do if you need one.
Pre-Polish
This is the stage where you will see the most startling improvement. Unless you have just stripped a relatively complete Clear-coat finish, the outer layer of the aluminum skin will have oxidized (aluminum rust) to a fuzzy pewter color. This is aluminum alloys’ way of protecting itself from the continuing oxidizing effects of oxygen in the air that would eventually result in full-scale corrosion. Our Caravel had been stripped sometime in the early 1980’s when the original Clear-coat had begun to fail. As a result it had become oxidized to the color of elephant skin. The exposed top had also become embellished with small pits.
The whole premise behind polishing is based upon inflicting progressively finer scratches to remove oxidation and scratches down to the parent aluminum skin. The general idea of polishing is to let the abrasives and fillers in the compounds (course) and polishes (fine) do the work. The application pads and cloth are there only to move the polish around. This continues until the abrasives that are suspended in the polish medium are completely coated with bits of oxidation. This ” polluted polish”, a.k.a. “Mud” is then removed from the skin surface either mechanically (dry cloth or buffer pad) or with a solvent. The art here is to determine when the polish has reached that point.
Another point that needs to be made is that the skins on the pre 1968 Airstreams were made from aircraft aluminum 2024T3 with a 0.005 inch alclad finish. This thin layer of pure (non-alloyed) aluminum is applied to prevent corrosion to the panel. Pure aluminum does not corrode as easily as the copper alloyed aluminum with its dissimilar metal content. The reason pure aluminum isn’t used for whole panels is that the skin panel would be as soft as foil. Pure aluminum will also polish to a more brilliant shine than alloyed aluminum with its varied metal contents. This is why vintage Airstreams will polish to a brighter shine than the post 1968 trailers. Alloyed aluminum will polish just fine, but there is a perceptible difference. What this means is that care must be taken not to remove too much material when polishing. The result is “patches” of skin that don’t polish (“gleam”) as well. Our trailer has such small spots – whoever stripped the trailer used a course sander or sandpaper to take off any stubborn Clear-coat. This is also why it is never a good idea to use acids to “brighten” the skin or to remove oxidation.
Anyway, back to the Pre-Polish. At the end of this stage all of the gray should be gone, the surface smooth and the skin a relatively even silver color. All of the black from any pits should be gone. Now is the time to touch-up any rough areas by working them more than once. The pits on the top of our trailer took much more effort than the sides. The first time around I used the Cyclo and the yellow pads and Rolite Pre-Polish. That was the hardest part of the entire polishing experience, requiring 3-5 passes to get the oxide and surface roughness removed. Combined with the fine scratches left by the pads loading up quickly with mud, and the muscle aching process of removing the mud from the skin, it was downright miserable.
So here is the first big change from how I did the Caravel. Since that time, I was introduced to a new method of removing oxidation that works real well. On this initial polish of heavily oxidized skin, use a 1/2″ variable speed drill with a 7″ wool bonnet chucked in it and the Nuvite G6 or G7 polish. Perfect Polish calls this a Compounder, and sells a pre-made head, but alos has instructions on how to make your own. This process even cuts through clear coat finish in no time. I wouldn’t use it to do that though, as the clearcoat breaks down into tiny abrasive slivers, creating scratches that will be trouble to later remove. Care must be taken to not grind more than necessary to avoid going down through the alclad layer. This will be noticeable in that the area won’t mirror up to the same shine as surrounding areas, and will oxidize faster in the future. Our trailer has a few spots like that from whoever stripped it, but they are not too noticeable.
Process: Apply the G7 or G6 direct to pad and do a 2′ x 2′ area. Heavy pressure is required here, and the mud will be either flung off or will load up on the bonnet. Use a bonnet rake to remove the mud from the bonnet before it hardens. Every 50 sq.’ or so, swap bonnets and soak the old pad in Mineral Spirits. The key is to polish with polish, not hard mud laced with aluminum oxide. I recommend starting at the top of the trailer and work around the
circumference, moving the scaffold as you go. When done with the top, pull the scaffold away and go around the sides. This is pretty much because polishing debris and “stuff” flows downhill. Keep checking the finished areas for little drops of flung mud. These can create little stalagmites that bond with the skin. I found out the hard way, requiring removal by chipping and re-polishing the area. See the PerfectPolish.com website for a more detailed explanation of this process.
If your trailer is not heavily oxidized, you may want to try a finer grade of Nuvite – and you may be able to even use the Cyclo and cloth instead of the drill motor and bonnet. The coarser the polish, the more the fine scratches that will have to polished out later.
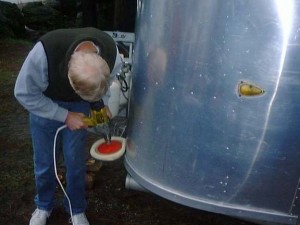
Tom from PerfectPolish.com demonstrating the “Compounder” pre-polishing technique.
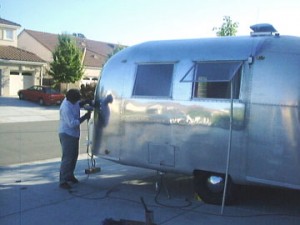
Pre-Polishing with the cyclo – never again…

The skin close-up before polishing…
and after the Cyclo/Rolite pre-polish process..
..compared to what skin looks like post Compounding/NuVite
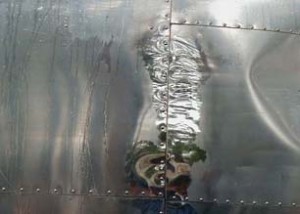
Yes, it even ate through the clearcoat ( not recommended as it leaves tiny scratches)
Polish
Once you have the heavy oxidation removed, it’s time to convert to the Cyclo. Here again, the first time around I used the green pads and the standard Rolite polish. The same issues apply here, the foam pads loaded up quickly and left tiny scratches if you didn’t constantly clean the pads, and the mud still required elbow grease and lots of diaper material to remove.
As noted earlier, the Cyclo is the ideal tool for this stage. The random orbital action and body shape adapt well to the use of sweatshirt material method. Rather than reinvent the wheel and describe how to use the sweatshirt material as a polishing cloth, check out the PerfectPolish site and Shirley Manning’s site on using this process.
In most cases the polish to use here is the Nuvite “S” grade. It seems to have some cut in it to remove the scratches from the coarser polishes, yet mirrors up as well as the Rolite AP-300 no-cut polish.
What I found best to work is apply a dollop (teaspoon +/-) to the skin with a paint stir stick, put the polisher cloth onto the skin and then smear it around. Failure to do this will result in your polish flying everywhere when you first start the polisher. Start the polisher and then work it over a 2×2 foot area, using panel and rivet lines for reference. I found that going back and forth at a slow speed (1-2 inches/sec), overlapping by one-half a pad area works the best. Too slow and you may overheat the polish and cause it to load up the pads. Continue this back and forth motion – just like plowing a field. The polish will soon start „pulling up‰ off the skin and onto the polisher cloth. Continue a little longer as the cloth pulls up this dried dirty mud. Don’t continue too long, as the loaded pad area with start causing swirl mark scratches from the oxide imbedded in the mud if it dries up too much from the heat and friction.
I tried all sorts of ways to remove the remaining polish mud. What I found to work best is to remove it by buffing with the cotton diapers. I used a hierarchical process where I used my blackest rag first, changing to a less polluted one, and then cleaning up with a clean rag. As I went, I would discard the first rag as it turned completely mud filled, and then everyone moved up a notch and a clean rag added to the process. The old black rags went into a bucket to be cleaned later (see previous section on Rags). If you have some heavy stuff, you can sprinkle corn starch on the mud before wiping with the cloths – speeds up removal tremendously. But, if you’ve done it right, the cloth should have picked up most of it. A final solvent wipedown with a diaper with Mineral Spirits (paint thinner) will remove any haze or black still left in pits or scratches. This involves spraying the mineral spirits from a spray bottle directly on the skin, and then wiping with a clean diaper. The process here is pretty much to keep moving the solvent around as it evaporates, loading up your cloth with the residue. What this does is get the mud out of the pits, from around the rivet heads and in the seams. The end result is stunning. This is where you will start getting the jokes about starting wildfires as you drive along the highway, and needing sunglasses to look at it. An alternative to the moneral spirits is Glass Wax applied from a mister. This is what Shirley Manning came up with to remove haze – it works really well.
Move to the next spot on the sweatshirt per here instructions and start over again on another spot. By accident, this where I found it best to seal the seams with the Parbond and Vulkem sealants – before doing the final polish. While I was waiting a week for a replacement head for the Cyclo to arrive (good idea to have a spare, only $7), I removed and reinstalled the water filler neck and sealed some of the seams in the back. It turned out that the polishing process doesn’t affect the sealant after it dries, it just turns it pewtery black. I then sealed the remaining seams after the final Polish/Sealer coat – big mistake. I ended up having to reapply the Polish/Sealer because of the handprints, solvent smears and sealant residue from the sealing process. The key is apply the sealant after most of your polishing is done, but before the final polish. The only requirement is that you need to remove the mud residual from the seams with the solvent first. I determined that the problems I encountered the first time around with the holographic effect in the finish were caused by the built-up mud on the Cyclo foam pads that occurred after about 15 minutes of polishing – no matter what I did to keep them clean.
More info on this process can be found on the Manning’s website and PerfectPolish.com
This is also where you will find that your trailer has dents! Hail damage and beauty marks that we never noticed before sprang to life. It is true that dents become more apparent when polished. It seems to be considered OK among Airstream aficionados to have theses little battle scars on polished Airstreams.
The final touch was the masking and painting of the “AIRSTREAM” metal placards above the front & back windows. See Restoration Resources for more details.
Other Polishing notes: I never have got the Rolite AP-300 to work right – it even loaded up using the cloth technique. The Nuvite “S” grade and Rolite Polish seem to mirror shine just fine. The hologram effect noted during the first polish on the Caravel was caused by the mud particles in the foam pads
during the Pre-Polish and Polish stages that occurred after about 15 minutes of polishing – no matter what I did to keep them clean. Live and Learn I guess. I was able to remove them a year later by going back over the trailer with the Cyclo, cloth and Nuvite “S”. The Rolite Polish worked fine this way too, and is equivalent to the slightly coarser “A” grade of Nuvite. It is a good idea to keep an eye on the polisher power cord and don’t let it touch the skin. With the vibration of the polisher, it will leave a nice little etching where ever it touches.
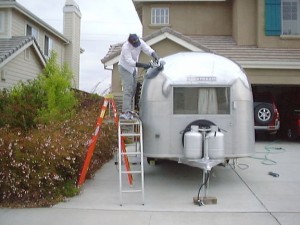
A perfect cloudy day to polish
Post Polish
Dents now show up!
After the Polish
Maintaining the Shine
The goal here is to slow down the inevitable – the reoxidation of the skin surface back to the powdery gray. The first season I applied a Polish/Sealer from Rolite, but have since switched plans, finding it easier to do a biennial once over light polish with the Nuvite “S” and the Cyclo/cloth technique. It takes about 5 hours, and also has the advantage of removing bird poop stains, little abrasions and water stains. But, if you are not too thrilled with the idea of polishing ever again, give either the Sealer (also sold by Rolite to marine trade to polish fiberglass boats), or Walbernize for non-clear coat trailers (available from Airstream dealers). If you don’t do a thing other than wash it, it would take about 3 years for the shine to fade, and about 12 years for skin to reoxidize to gray (estimate, dry climate, unprotected).
Here’s some tips should you decide to try the Sealers. It applies with a cotton cloth in a circular motion, covering about 3 square feet. I found a 6×6 inch piece of diaper – and here’s the secret – pre-moistened with water and wrung dry. Rinse out and repeat during the course of the application when the cloth becomes saturated with sealer or dry. Apply the sealer in a thin but even hazy layer. If you have a splotchy effect that means the rag is too dry or you are not using enough sealer. Allow the Polish/Sealer to dry to a haze and then buff off with a clean cotton cloth (diaper again). The result is a glass smooth finish that washes or dusts off well. This step goes rapidly compared to the others, and doesn’t require power tools (but needs the scaffolding) – and is quite fun. Don’t even think of trying it in full sun, though. What I found was it protected the finish through the first summer and winter well. The next spring it no longer beaded up water, and bird poop and rain streaks were evident, so once a year in the spring is a good idea and also in the fall is even better. Don’t apply it if the surface has been ignored for awhile, as it doesn’t work well on even slightly oxidized surfaces. Don’t apply when it is cold – it put tiny swirl marks in the finish I had to polish out. Full sun will dry it before you can spread it. Best bet is 70° plus and in the shade.
Of course the best way to preserve the shine is to store the trailer indoors or under cover.
Washing
To wash, we found that simple detergent car wash works the best – no waxes or “special solvent cleaners”. We use Meguiars brand, mixed in a bucket. Rinse off the dust and then apply the car wash solution with a 12 to 18 inch window washing pad at the end of a 5 foot extension pole, loosening up the dirt and grime. This way you can get the top with just an A-frame ladder. Rinse off and dry with large Terry cloth bath towels. These are great in that you can unfurl them across the top of the trailer and draw it back towards you and down the side of the trailer, drying large chunks of real estate at a time. I tried chamois, but it took 3 times as long and left a film on the surface. I don’t think it liked the Polish/Sealer. If you let the water dry on the trailer, it will develop noticeable water spots. I have observed that the Sealer causes the water to bead up, making drying a snap. It also helps dirt, bug splats and dust rinse off with ease. As with any RV, expect to wash your trailer about 2-4 times per year, depending on the length of your “season”. This translates to about every 60 days (or before each trip – which is our plan of attack).
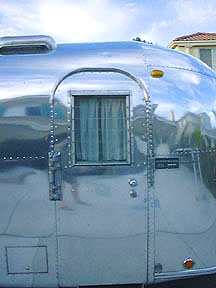
You can’t have a shiny enough polish, as it will fade over the years, so even if you don’t like mirror finish Airstreams, you will get more mileage out of your polish by getting it as shiny as possible the first time around.
Final finish with Sealer – you can almost see the tiny pits – that’s how bad the skin was pitted when I started
Summary
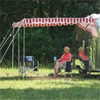
First of all, “why polish anyway?” For us, it was culmination of 9 months of hard work restoring the trailer. It was the one step that took the Caravel from an old gray trailer to a restored classic. It is what people notice first – then they see the machine age styling and wood interior. Secondly, a polished exterior is the original finish. The aircraft aluminum sheets were made with a polished finish to begin with. Just take a look at the original photo of the Ford Convertible and the Bambi on the VAC homepage and the Airstream photo from the 1960s below.
Would we do it again? Yep, it was hard, miserable, dirty, time consuming work – but the finished result was worth it. Would we do it different? He who fails to learn from his mistakes is doomed to repeat them over again. I would do it under some sort of cover, an open sided carport would be ideal, or in a building with lights. This way it could be done in the wintertime, too. Otherwise, polishing is a fair-weather proposition. As I noted earlier, I would also use the Compounder/Cyclo& cloth method. I’ve already used this process as we proceed with the restoration of the Flying Cloud with great success.
If the initial stripping and polish sounds a little too beyond your capabilities either time, health or facility wise, then consider having it professionally done. Once done, the finish should be relatively easy to maintain. Check the Links page for known commercial polishers, or ask on the AirstreamForums for recommendations. Arlen & Shirley Manning have included many tips and insight on polishing using a Cyclo and NuVite polish on their website.
Be sure to check out the Perfect Polish website. I get no money from them – I just feel that when something works well, you need to tell everyone.
Updates
These are additional observations from our continual experimenting and learning after “The Polish”.
* Bird sh## is bad news. Wash it off immediately. It etches the skin to a gray color. Depending on what the foul fowl has been eating, it will even etch into the aluminum.
* Don’t use Polish on the skin to touch-up after a month or so. The gradual reoxidation that occurs will result in this spot being shinier than the rest of the skin. Yes, this is from experience, and does answer the question that an annual or every-other-year once over quick polish will be a good idea to maintain the original luster of the polish.
* Washing is good. Dust and grime don’t stick because of the sealer and rinses off easily. The previously mentioned washing method works well. We have the washing/drying, process down to 20 minutes from start to clean-up.
* Question came up, “How did the first owners of non Clear-coated Airstreams keep their trailers from turning gray?” Answer: ” Walbernize”. It is available from A/S dealers in two types – one to keep clear coated trailers healthy, the other to polish up and protect bare trailers once a year.
* Follow-up question was, “when did clearcoat start being applied?” It was first offered as an option in 1962, became standard in 1963.
*I have discovered that when removing the mud from the skin with a cloth during polishing, sprinkle corn starch on the mud first, and then wipe. It makes the removal much easier.
* If you use your trailer regularly, I would avoid trying for and maintaining a perfect mirror shine, as worrying about dirt, kids, the weather and the state of your shine will take the fun right out of your trips. I instead recommend, just relax with the knowledge that all the blemishes will disappear with the next quick polish every few years.
Mirror, Mirror…
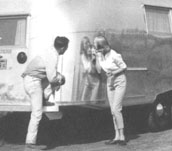
The delivery finish on Airstreams was the original shiny polished aluminum aircraft skin material
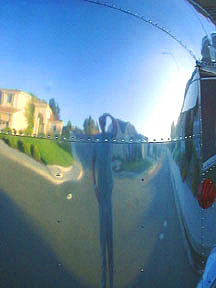
Self Portrait


