The Restoration
The restoration process took place in our driveway starting November of 1999. This made the neighbors real happy (well, except those we didn’t care about anyway). We even received a CC&R code violation notice from the city, but doggedly continued (what’ya mean I can’t work on my trailer in my own driveway??). Our original estimate was 450 hours of work and $2000 additional to complete the work. Check at the end of this section to see what the actual amounts were. They were rather surprising.
First order of business was to remove the newer Duo-Therm roof mounted air-conditioner and replace it with the original vent and fan that the prior owner had saved when installing the A/C. The air-conditioner overpowered the little Caravel and almost rivaled it in size. We mainly boondock camp in the Sierra Mountains or along the Pacific Coast, so not much was lost other than 50 pounds of dead weight that was deforming the inner skin panel. Luckily the skin panels popped back out when the AC was removed. The old vent went back in with Olympic Rivets, Vulkem Sealant, and 2 new inside trim strips I fabricated to replace missing ones. A little Zolatone paint treatment and they looked like the originals. At first, all we had was a replacement plastic 14×14 cover, so I riveted strips of garage door bulb seal (Maclanburg-Duncan brand) on the outside of the 12×12 vent opening, as the plastic covers won’t come down far enough to meet it. This provided a tight seal.
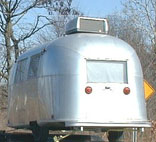
The Duo-Therm looks like a goofy hat on the little Caravel
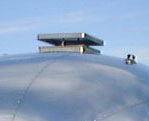
The vent cover as it is now with an original Hehr cover
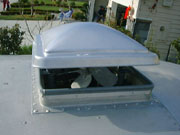
The vent as converted to a modern 14×14 plastic vent cover. Click image to see how it was done
Later we got an original Hehr 14×14 aluminum cover from Scott Scheuermann. The Hehr original cover has a built in rubber seal at 12″ that comes down on top of the original vent rim opening, providing the seal. A little lithium grease on the LeDeux openers completed the restoration. It is important to routinely check the 6 rivets that secure the lid to the opener throughout the season, as the failure of these is what causes the vent to frequently depart while traveling.

The soggy insulation was replaced with 2″ styrofoam cut to fit between the frames
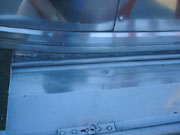
The gap between that had to be sealed to prevent water from going into the wood floor, causing it to rot
Next on the list was to stem the water leak that had rotted the floor under the lavatory sink. I dropped all the belly skins, sandblasted & spray-painted the frame black, replaced the tired fiberglass batt insulation with 2″ Styrofoam board – held up by 2″ screws into the flooring, and did a good visual inspection. This was supposed to be an easy restoration of a sound original trailer, but there across the whole back sub-floor was dry rot. Seems Wally’s engineers couldn’t figure out what to do with the frame where it exits at the rear and forms the bumper. These ’60’s trailers have the sewer hose compartment top skin lay on top of the frame, and then extend back underneath the wood floor. All the rain that comes down the back of the trailer skin hits that skin & shoots right into the wood floor! I hogged out all the bad wood from below and attached a steel doubler plate to the bottom over the damaged area. I then mixed and poured epoxy wood filler from above (under the lav sink) and leveled it off, working it out to the edges under the shell. After it cured, you can hardly tell where the wood stops and the epoxy begins. To correct the leak, I put a gray bulb seal in the crevice below the rear skin and the top of the sewage hose compartment and then sealed it in place with Vulkem. I also sealed the top of the lower belt-line trim strip so that water running down the back of the trailer doesn’t go behind it. I then reattached all the belly skins using the same fastener holes, oversizing when necessary. For damaged skin lap holes I found a great 3/8″ pop-rivet from Arrow that has a wide 5/8″ head and a steel mandrel – these babies lock in place! My best work is all covered up, but it is great knowing the trailer’s foundation is clean and secure – ready for another 35 years.
We knew the gas only Dometic M16 refrigerator was dead, so it was next. I was able to get it to run again by cleaning up the burner. I would like to have saved the original unit but it had been unused for so long that too many parts were AWOL. There is something about porcelained steel and the aluminum frame that the new plastic lined boxes and doors don’t have. I also don’t feel that something running off a circuit board is going to last 30+ years, either. Anyway, no choice here – out it comes, and in place goes a new Dometic RM2333 ($700). There is no Dometic or Norcold available with the exact dimensions, so we went with the RM2333 – narrower and taller than the original – on paper at least. It turns out the old M16 had a cutout for the wheelwell, the RM2333 didn’t. As a result, I had to rework the cabinetry to move it forward 1 1/2″. I reworked the drawer-box, frame and drawer front to accommodate the taller fridge. Result is a nice silverware drawer. The original drawer bins moved over under the sink in new slots. New matching sheets of mahogany plywood on the door front and end panel, trimmed in old aluminum countertop trim finish the installation.
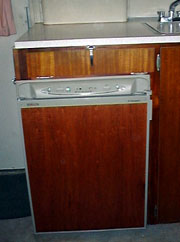
The new refrigerator. Click image to see how the conversion was done
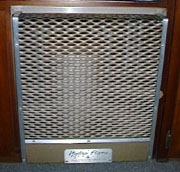
The Hydro-Flame gas heater sits under the oven and requires no electricity
After finishing up the fridge, we followed the LP lines and dismantled the non-working Hydro-Flame heater. I dropped the bottom out of the combustion chamber and cleaned the burner. It had piled up with rust, scale, leaves & wasp nests from the outside vent flue. When all reinstalled it worked with a little tweaking of the pilot assembly.
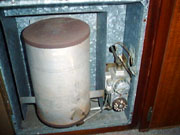
The combustion chamber and control assembly. Access to the burner is through the bottom
The original Bowen hot-water heater worked just fine, and needed just a little cleaning. The original exterior vent shrouds on these look so cool. In replacing a HW heater, it is best to install the new unit from the inside, or widen the opening behind the shroud, reinstalling the old shroud when done. The white flimsy modern replacement is one way to take the “style” right off your Airstream.
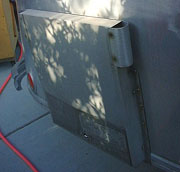
The Bowen/Atwood hot water heater shroud is a work of 100% aluminum art
The electrical system was not in too bad of shape, just a few unterminated 110v wires from the earlier AC installation and some tidying up of some wiring replacements from over the years. We found two 14/2 original wires that I have no clue as to where they go. Check it out and let us know if you know.

The plumbing required a lot of work due to age of the seals. All the faucets required Harcraft overhaul kits, the sink/lav/shower traps new freeze protection drain plugs, the water check valve a new rubber seat, and the water tank a thorough scrubbing (some sort of algae had taken up residence inside the tank). The original Peters & Russel water pump worked just fine. 1964/1965 was the first model year Airstream went from compressed air systems with galvanized tanks to water pumps and plastic tanks.

The original heavy piston type Russel & Peters water pump
On to the toilet! We rebuilt the Badger toilet seat. No new cheapo plastic seat for us – no way! Can’t beat the feel of the original enameled wood. It’s just the plastic parts had started to crumble away. The hardware store had all the hinge, mounting, and bumper parts needed. A little adapting to the new parts and it looks like it was when new.
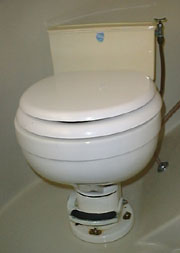
The throne…
The toilet tank and lid needed some epoxy repairs, and the float needed soldering, but the finished Townsend porcelain toilet is a worthy throne. The newer plastic jobbers just don’t have the durability or the right look & “feel”.
Badger enameled wood seat
As this was winter, we continued on with the interior. We went through the interior front to back replacing all the popped rivets and the loose & broken hardware with parts we had been collecting from A/S dealers and the hardware store. Fixed up both bed frames, replacing missing fasteners and waxing the slides, etc. Replaced some closet panels that been destroyed by leaks around the vent pipes. Refinished all the mahogany cabinets with WATCO Danish oil which resulted in a nice warm glow to the wood. This is what an old A/S placard we found in the closet recommended. An application every few years should do it. I think A/S’s choice was a good one. Varnishes and polyurethanes tend to make darker woods look plastic. They are not as easy to touchup, and tend to flake with time.

By now Spring had rolled around and the weather was getting better, so we crawled out into the daylight and overhauled the old Bargman taillights and license frame light/holder. On the taillights we replaced all the dried-up gaskets, grommets & installed new stainless steel hardware. The bases got sandblasted and spray-painted.
The door weather-strip was replaced with material obtained from Vintage Trailer Supply – and then we started eyeing the windows. This was the one part of the trailer that time was not kind to. Most of the Hehr openers where inoperative due to the pot-metal gear failing. The windowpane retainer strips were brittle, and the frame weather-stripping was shot. The welds in one frame were broken and there were unexplained holes in the bathroom frame. These repairs took a long time, but the windows are now fully functional. New Blaine replacement openers (I kept the original Hehr’s to fix someday), new galss retainer strips from Vintage Trailer Supply and Zolatone painted latches.
(Update 7-5-05). I finally found an exact replacement for the window frame seal from Vintage Trailer Supply. It is a new product from them and it fits and looks great.
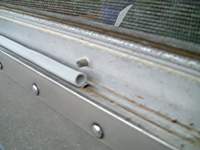
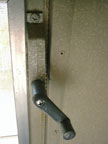
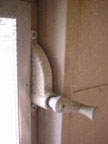
An original Hehr opener
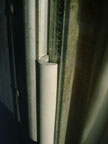
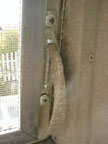
Cross view of the replacement Hehr pane retainer strips
The external refrigerator vent had been replaced some time in it’s past with an ill fitting plastic cover. The new vent covers are 28″ long, so I had to rework one to the old style length of 24″. To finish up the outside I replaced the broken rear bumper cover latches (Vintage Trailer Supply) and all the exterior hardware with stainless. The old plastic TV-Antenna lead-in unit was replaced with a manufactured duplicate using the end of a large PVC cap and a Radio Shack terminal strip.
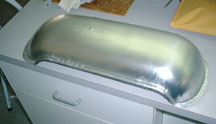
Reworked refrigerator vent cover and how it looks installed. (Click on image to see Restoration Topic on how to do it)
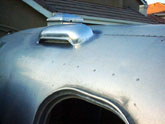

New Antenna lead-in fitting. UV rays did in the old one
The original 30# LPG tanks were replaced with new aluminum Worthington tanks from Vintage Trailer Supply. This choice was made because of the ability to polish these tanks, but also their lighter weight and the Overpressure Device (OPD) valve requirement that took effect in 2001. The tongue and bumper was painted with Rustoleum “Aluminum” spray-paint. The jack required multiple applications of lithium grease sprayed into the top while running the jack up and down.
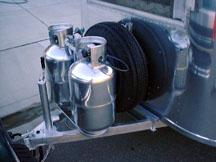
Business end of the trailer and the new Worthington aluminum tanks
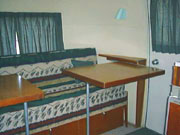
As we were now into summer, our original estimate of a June 1 completion date came and went. I was starting to collect polishing materials, and Krista was sewing away on new fully lined curtains. She obtained new dense foam pads (Super Foam from O.U.S. Fabrics) and covered them with a durable upholstery material from a mill ends store. The replacement carpet was worn out (the original asbestos floor tiles had been replaced some time in the ’80’s), so I cut and installed a 3/8″ foam backed commercial level loop polyester carpet in “dirt” color (“good choice” said the carpet distributor).
The wheels received a pair of new shoes – 6.70×15 LT (8ply) tires, new grease seals, and new Monroe shocks (fit the front of a 1960-67 Chevy Pick-up, Napa pn 94005). The brakes were inspected, too. The original moon hupcaps will get rechromed one day, but for now they got a good cleaning & polish. The tires only clear the front of the wheelwell by 1/4″. This prevents any other tire but 6.70×15 LTs being used. Airstream did this to allow a refrigerator to be installed in the curbside galley between the door and the wheelwell.
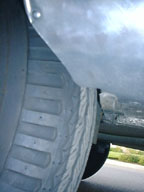
The front of the original size 6.70×15 tires clear the front of the wheelwell by 1/4″
And what did we save for last? The one thing that changed the Caravel from an “old trailer” to a “restored classic”: Yep -“The Polish”. I bought a Cyclo polisher & heads, $200 of Rolite polish, and went for it. I think the pictures speak for themselves. The final touch was the masking and painting of the “AIRSTREAM” metal placards above the front & back windows.
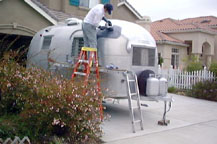
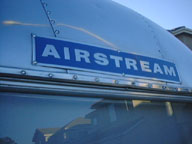
The Airstream nameplate restored to its original blue. (Click on image to see more “how to” details)
Well, $8400* and 520 hours of unpaid work later, we have a classic restored Airstream that is fun to camp and travel in, a real attention getter at campgrounds, rest stops and events, and is a dream to tow. Would we do it again? Well, I am rather surprised at our answer -Yes, we would. Of course, many things we would do a whole lot different, but that is why experience is such a good teacher. Krista does not think she would do the upholstery again, and I would try to arrange to work on the exterior under some sort of building or cover, just to name a few. Check out the Restoration Topics section for ideas that can possibly help you do things right the first time (the stuff we wish we had known about).
* $3500 purchase price, $1100 transportation, $3800 parts & materials (2000)

Back to the home page for the restoration of our 1965 Caravel


